|
AFBR-S50 API Reference Manual v1.6.6
AFBR-S50 Time-of-Flight Sensor SDK for Embedded Software
|
|
AFBR-S50 API Reference Manual v1.6.6
AFBR-S50 Time-of-Flight Sensor SDK for Embedded Software
|
The provided example projects can be run on the NXP targets (MKL46Z, MKL17Z) using the MCUXpresso IDE. The evaluation kit is build on the FRDM-KL46z Evaluation Kit from NXP. Also refer to https://www.nxp.com/frdm-kl46z for further information.
Execute the following steps to get the example projects up and running. Please also refer to the getting started guide by NXP in case of any trouble.
[INSTALL_DIR]\Device\Projects\) are provided as zip-file and will be copied into the MCUXpressoIDE workspace. The projects downloaded or cloned from the AFBR-S50 GitHub repository are already unpacked an must be imported but not copied into the MCUXpressoIDE workspace (otherwise the project references may become invalid).In order to run provided project, execute the following steps:
Download and install the MCUXpresso IDE (recommended v11.5 or higher):
Download and register or sign in to download the installer.Download and import the NXP MKL46z SDK (or NXP MKL17z SDK) into the MCUXpresso IDE
Launch.Download and Install SDKs on the Welcome Page.Processors tab and type MKL46 into the filter field, select the SDK_2.x_MKL46Z256xxx4 (or SDK_2.x_MKL17Z256xxx4) SDK and click InstallFinish.Welcome view.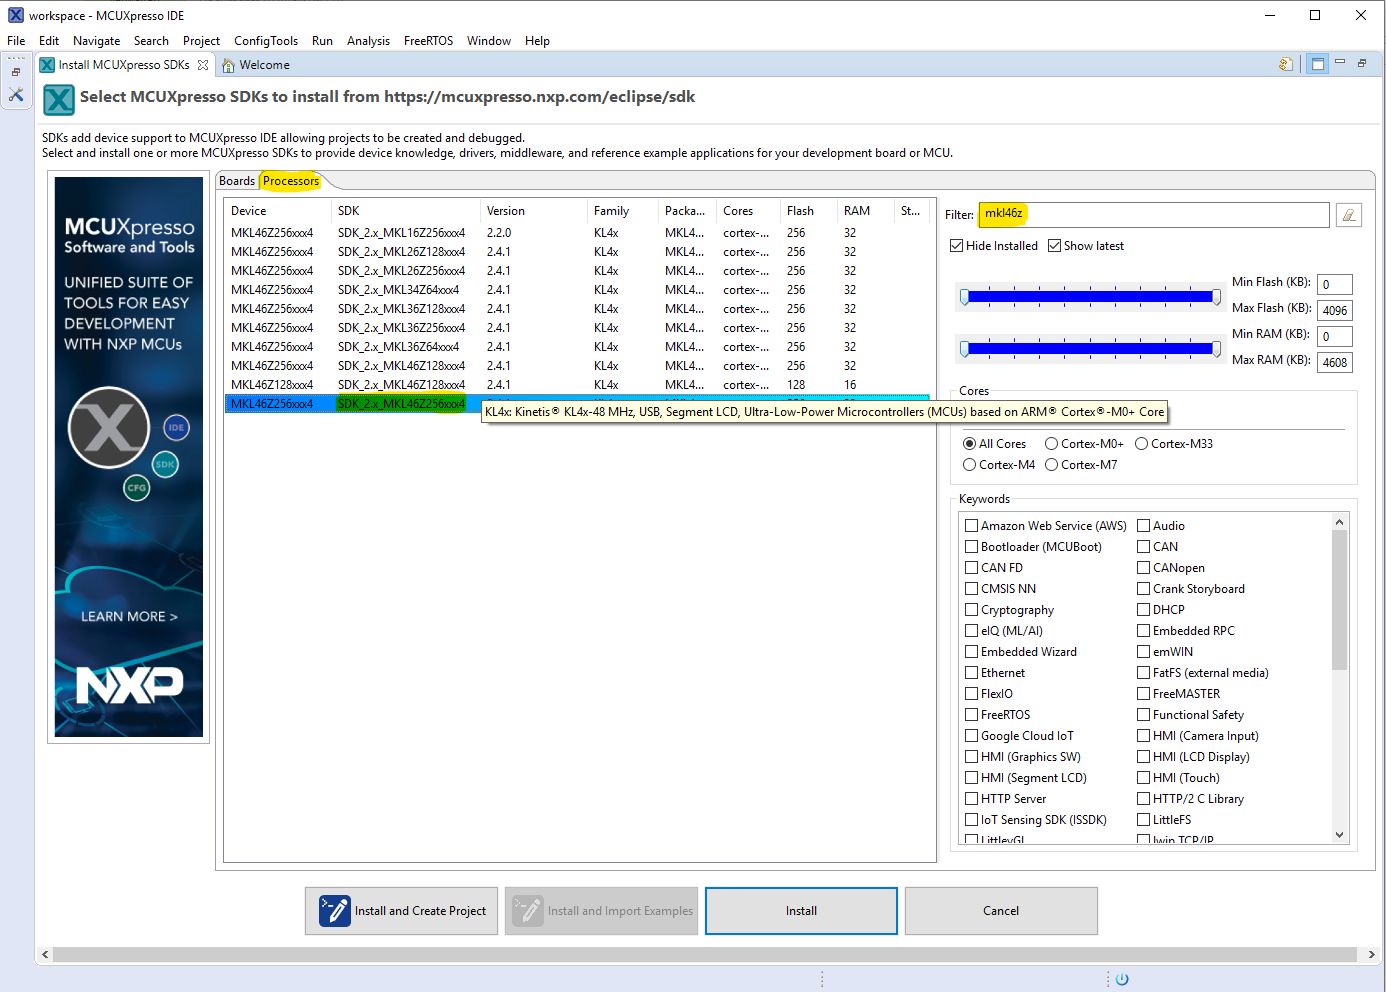
Import the Project archive files:
Quickstart PanelImport projects(s) from file system...Browse... in the Project archive (zip) section[INSTALL_DIR]\Device\Projects\ (default is C:\Program Files (x86)\Broadcom\AFBR-S50 SDK\Device\Projects\)AFBR_S50_Example_KL46z.zip) and click Open 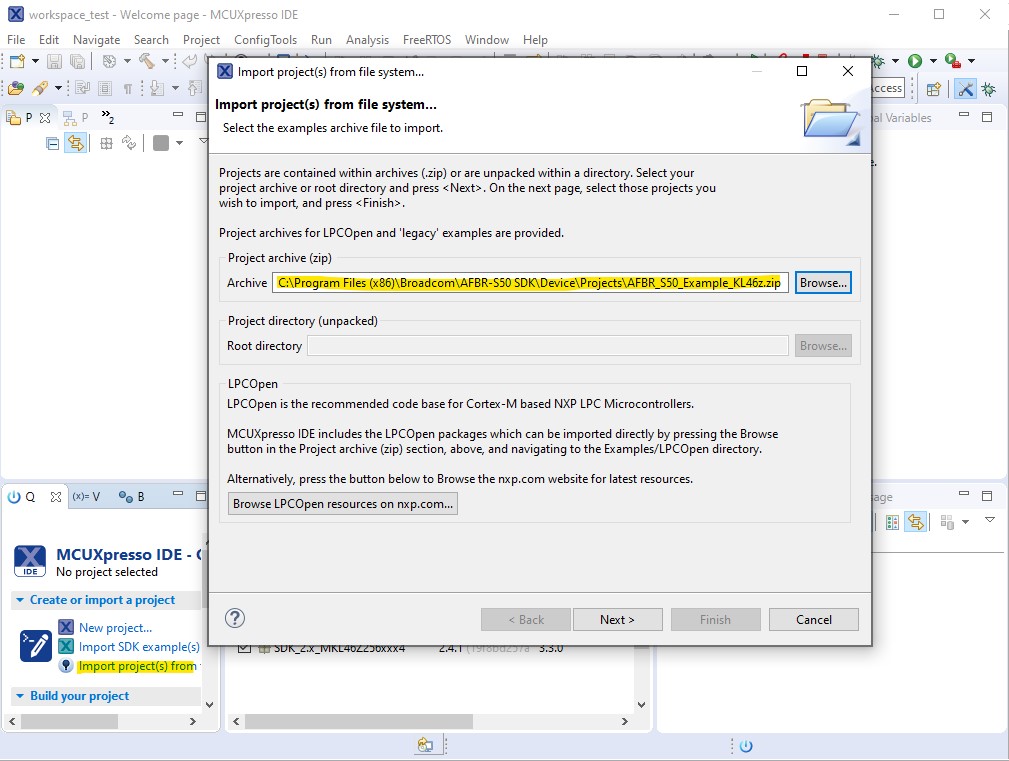
Browse... in the Project directory (unpacked) section[REPOSITORY_ROOT]\Projects\MCUXpressoIDE\AFBR_S50_Example_KL46z) and click Select FolderNextand disable the check at Copy projects into Workspace. (Otherwise, the references to the source files will be messed up!) 
FinishSPI_SLAVE = 1) identifier is used for all current evaluation or reference boards. Only some deprecated evaluation boards based on the FRDM-KL46z evaluation board may use the fifth (SPI_SLAVE = 5) SPI slave which needs to be set manually in the example.h (within Project > App > examples > example.h) file by changing the SPI_SLAVE preprocessor definition accordingly.Project Explorer and select the project to build.Quickstart Panel and click on Build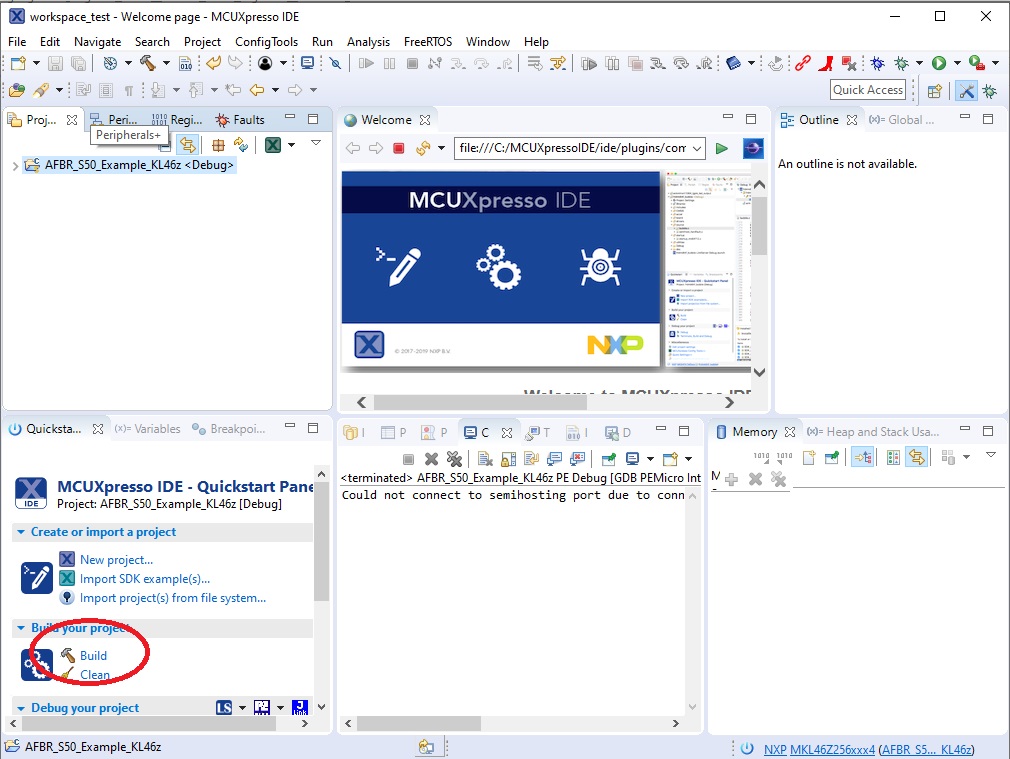
PEDrivers_install.exeOpenSDA USB port of the FRMD-KL46z evaluation board.Quickstart PanelOK 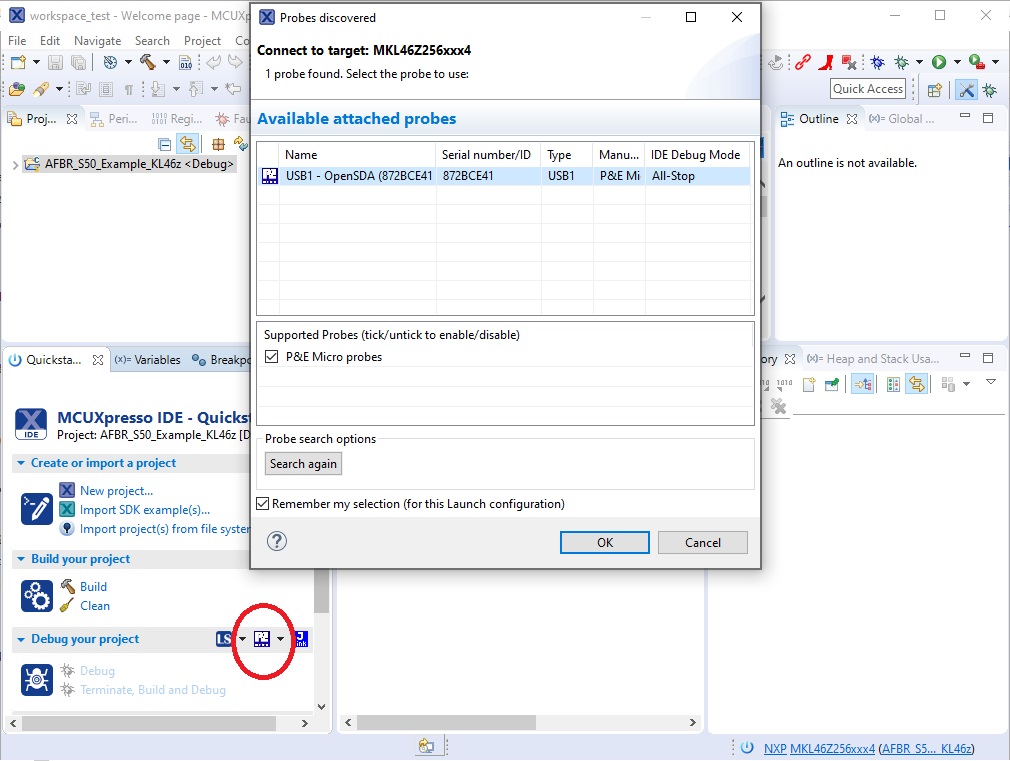
main() function, hit the Resume button. 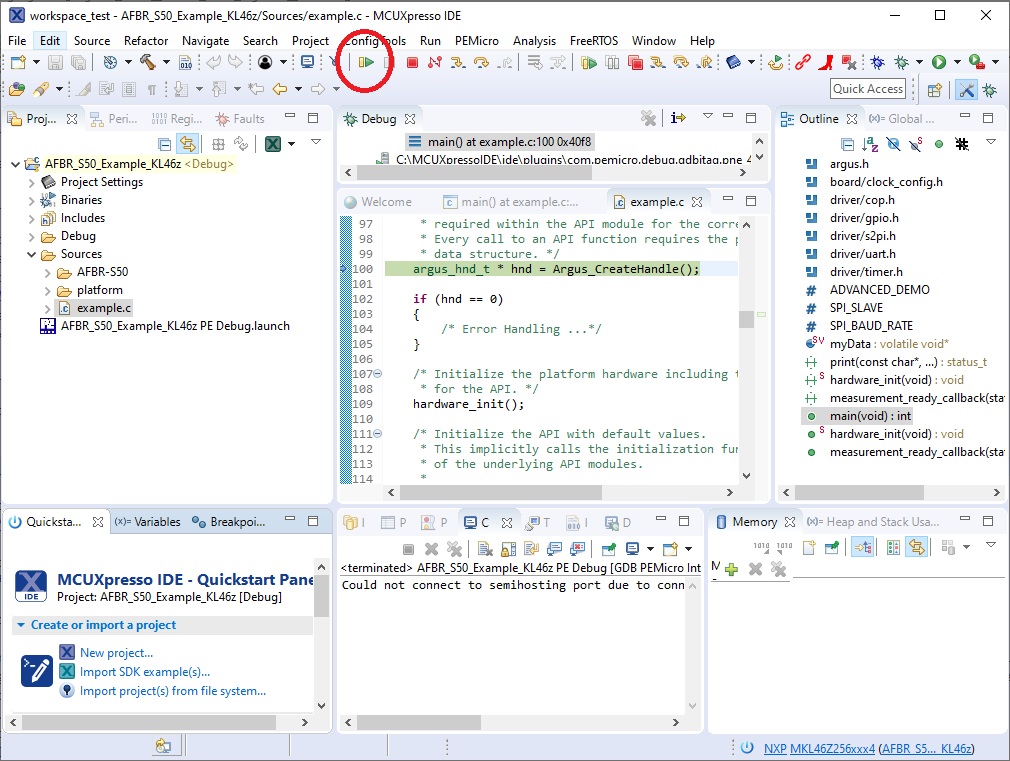
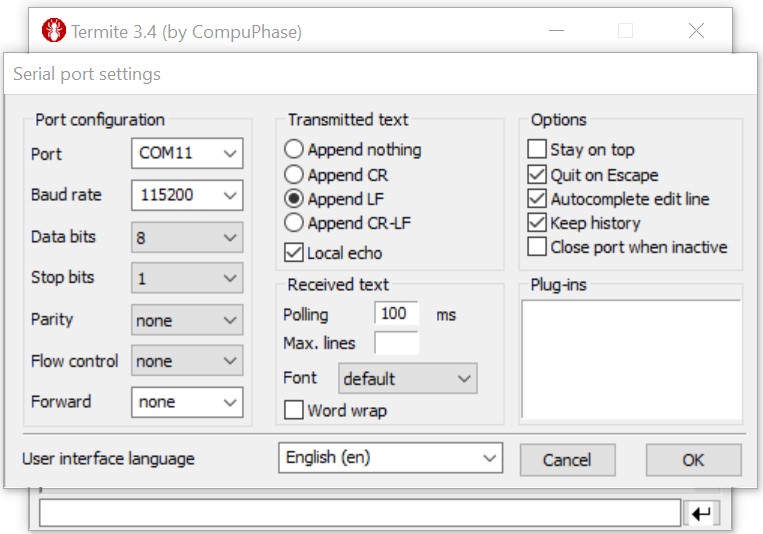
Display the measurement values on a PC via an UART terminal:
| Baud rate | Data Bits | Stop Bits | Parity | Flow Control |
|---|---|---|---|---|
| 115200 bps | 8 | 1 | none | none |