The provided example projects can be run on the Renesas targets (RA4M2) using the e² Studio IDE.
- Note
- This guide shows how to use the example projects but the same steps can be executed to run the other e² Studio IDE projects. See Demo Applications for an overview.
Execute the following steps to get the example projects up and running. Please also refer to the e² Studio documentation by Renesas in case of any trouble.
- Note
- Depending on where you obtain the code, i.e. from the SDK installer or the GitHub repository, certain steps may differ. The projects that come with the SDK installer (found at
[INSTALL_DIR]\Device\Projects\
) are provided as zip-file and will be copied into the e² Studio workspace. The projects downloaded or cloned from the AFBR-S50 GitHub repository are already unpacked an must be imported but not copied into the e² Studio workspace (otherwise the project references may become invalid).
In order to run provided project, execute the following steps:
Install Renesas e² Studio IDE
Download and install the e² Studio IDE:
- Go to https://www.renesas.com/us/en/software-tool/e-studio
- Click on
Download
and register or sign in to download the installer.
- Install the IDE.
- Go to https://www.renesas.com/us/en/software-tool/e2studio-support for more information.
- Note
- Please make sure the installation adds a recent version of the Renesas FSP (Flexible Software Package). Otherwise, you may need to add it after the installation. Go to https://github.com/renesas/fsp/releases and browse for the latest
FSP_Packs_v#.#.#.exe
.
Import a Project
Import the project archive files:
- Go to e² Studio IDE ->
Welcome Page
- Click on
Import existing projects
- Select your project for import:
- If importing a project as zip file as provided by the SDK installer:
- Click on
Browse...
in the Select archive file
section
- Browse to
[INSTALL_DIR]\Device\Projects\
(default is C:\Program Files (x86)\Broadcom\AFBR-S50 SDK\Device\Projects\
)
- Select the required project archive (e.g.
AFBR_S50_Example_RA4M2.zip
) and click Open
- If importing a project from the local directory as provided by cloning/downloading the GitHub repository:
- Click on
Browse...
in the Select root directory
section
- Browse to
[REPOSITORY_ROOT]\Projects\e2studio\
- Select the required project root folder (e.g.
AFBR_S50_Example_RA4M2
) and click Select Folder
- IMPORTANT: Click
Next
and disable the check at Copy projects into Workspace
. (Otherwise, the references to the source files will be messed up!)
Fig. 3.9: Import Project to e² Studio
- Click
Finish
Build the Project
- Go to e² Studio IDE ->
Project Explorer
and select the project to build.
- Go to
Quickstart Panel
and click on Build
Fig. 3.10: Build the project on e² Studio.
- Note
- If the build fails and the IDE complains about missing definitions or files, make sure that the e2 Studio and FSP installations are not broken. This seems to randomly happen when the FSP is updated to a newer version. In that case, completely remove the Renesas e2 Studio and all related stuff (e.g. uninstall everything label with Renesas) and reinstall the latest e2 Studio IDE and FSP package as described above.
Debug the Project with a SWD debugger
The Renesas RA4M2 on the AFBR-S50 Reference Board can be debugged with any SWD debug probe supported by the e² Studio. Please refer to the e² Studio documentation for more information. The following demonstrate the steps using a J-Link SWD Debug Probe:
- Connect the debug probe via SWD cable to the debug probe on the reference board.
- Select the project to debug in the
Project Explorer
of the Renesas e² Studio IDE
.
- Select
Run
> Debug Configurations...
.
- Select
Renesas GDB Hardware Debugging
and click the New Configuration
Button.
- In the new configuration, go to
Debugger
- In
Debug Hardware
select J-Link ARM
- In
Target Device
select R7FA4M2AD
- Click
Apply
and Debug
Fig. 3.11: Debug Configuration.
- The program breaks at the
Reset_Handler()
. Click on Resume
and program breaks at the main()
, hit Resume
and the program runs.
Fig. 3.12: Resume the halted program.
Connect the UART interface to PC
Follow the steps in the Serial (UART) Connector section to connect to the board via UART.
Display the Measurement Values
- Note
- This applies only for the Example Apps. In case of the Explorer App, use the AFBR-S50 Explorer GUI instead.
Display the measurement values on a PC via an UART terminal:
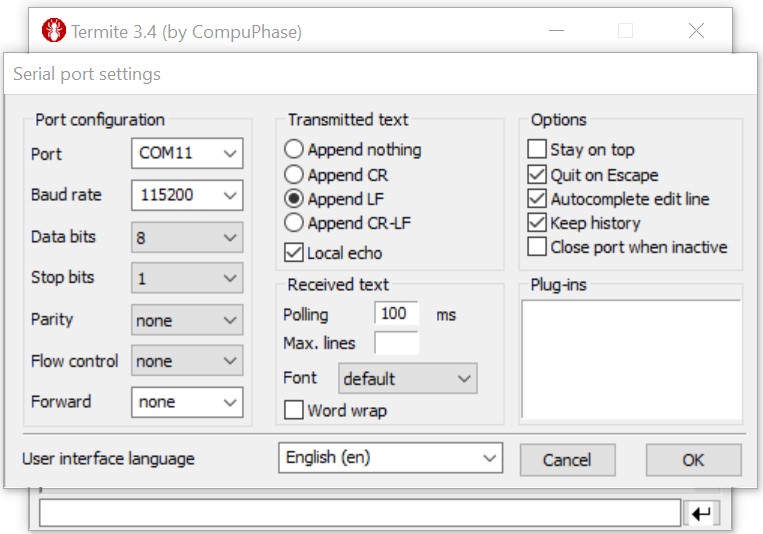
- Open a terminal (e.g. Termite) and open a UART connection using 115200 bps, 8N1, no handshake connection.
Baud rate | Data Bits | Stop Bits | Parity | Flow Control |
115200 bps | 8 | 1 | none | none |
Fig. 3.7: Setting up the terminal to receive measurement results.
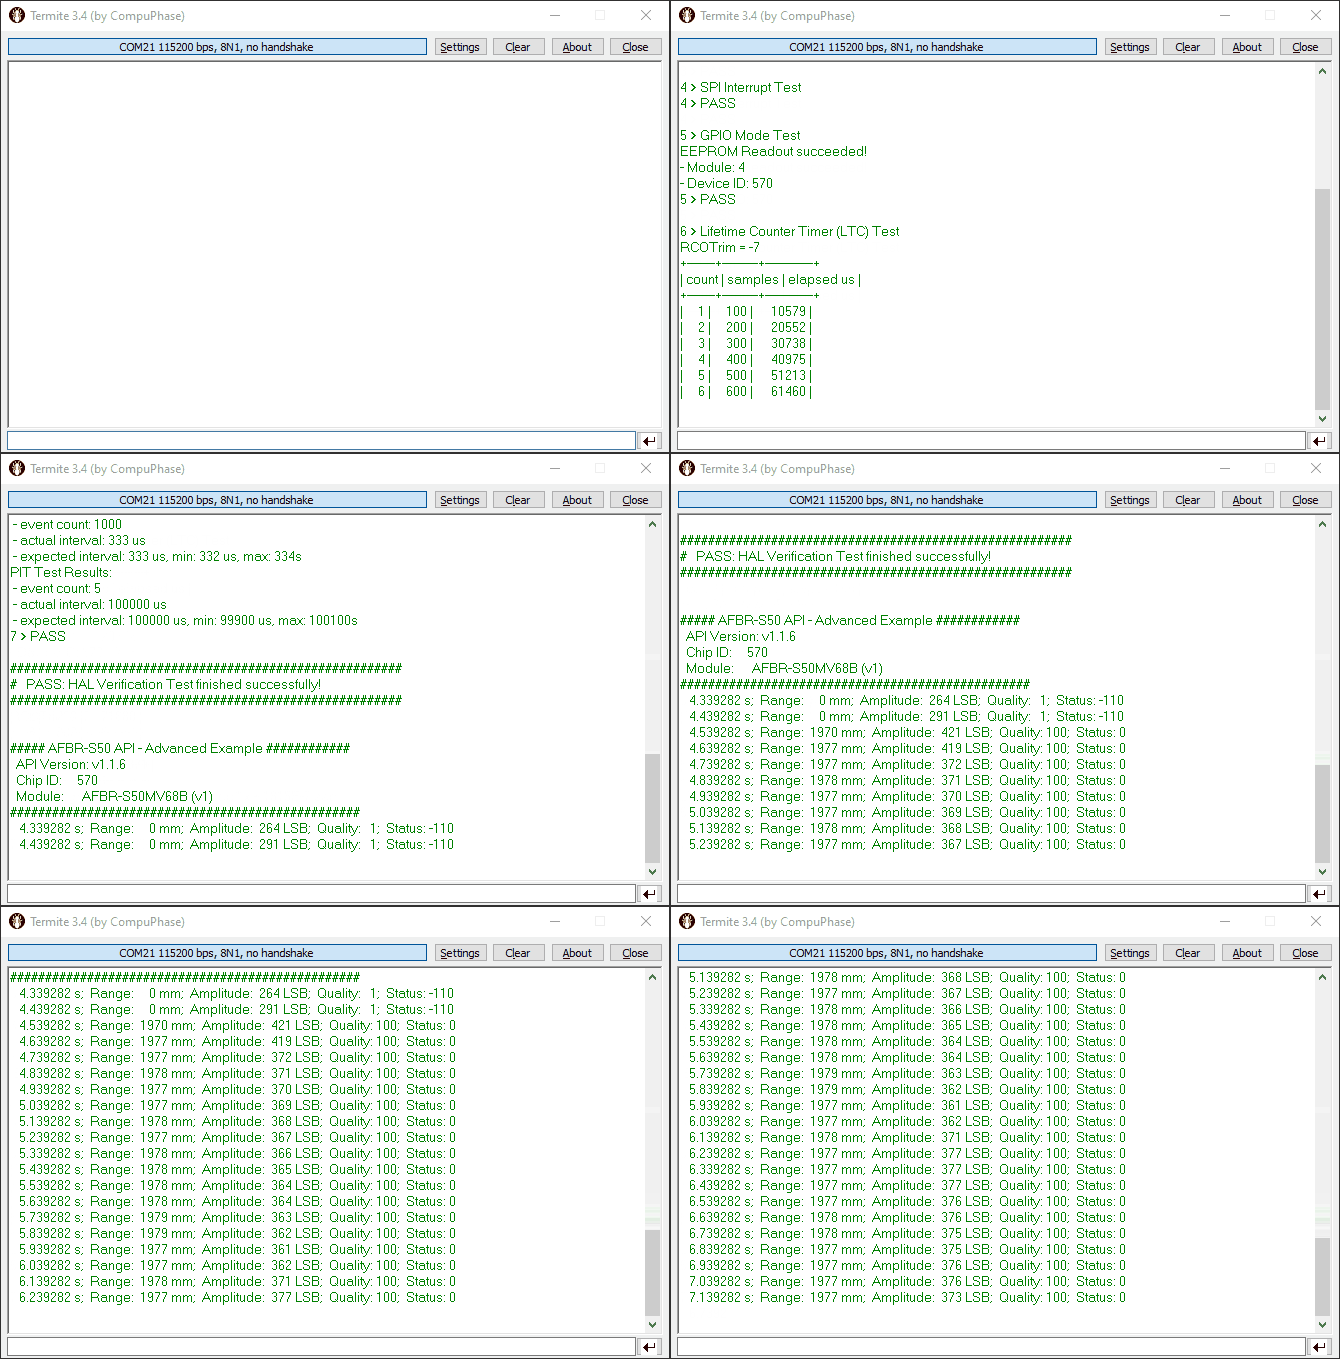
- Range values will start to occur on the terminal as soon as the program starts its execution.
Fig. 3.8: The serial terminal is used to display the received measurement results.